
We’re in the belly of winter here in southwest Missouri, and there isn’t a dab of green anywhere on the ground. While I’ve always thought that winter brings it’s own beauty, stark, quiet and distant, the chickens and I are longing for the fresh homegrown garden greens (or lawn greens in the case of the chickens.) I’d say there are probably a few gals and feathered friends who can relate.

So, what’s a girl and her feathered flock to do when there is no garden or pasture in sight? Take things into our own hands…er, beaks I mean.
Growing sprouts is such an easy, fun way to supplement our winter weather blues with a little green pick me up. For chicken owners sprouting is especially helpful as it can help cut feed costs drastically, and your chickens will be getting extra nutrients which means more big, beautiful eggs. And well, if you don’t have any chickens, you can feel good about growing your own food and enjoy the sprouts on sandwiches, salads and baking (think Ezekiel bread.)
I’ve been growing sprouts for the chickens for couple of months now, and they go wild every morning when I bring them out. Before I started sprouting, I was feeding my hens one cereal bowl of laying feed and one cereal bowl of cracked corn. Now, I feed them a half-bowl of corn, a half-bowl of layer feed and a jar of sprouts. There is usually even a few bits left over for the cardinals and blue jays after the chickens have left to go scratch up creepy crawlies in the woods.

I chose to sprout winter wheat for the chickens because it’s easy, cheap and healthy, but you can sprout a magnitude of different seeds. Alfalfa is probably the most common for human meals, but just about any bean or seed can be sprouted (as long as it hasn’t been heat-treated.) Check out your local health food store for options available to you. I bought a 50 pound bag of winter wheat (usually sold for planting or feeding animals) at our local feed store for just under 10 bucks. There are approximately 100 cups of wheat berries in the bag, and considering I use 2/3 cup of berries per daily jar, that means I can provide half of my chicken feed for five months for under 10 dollars!

I’m a big believer in the non-GMO movement, and considering the eggs we eat come from the chickens we feed, I am careful to only feed non-GMO rations. The good thing about wheat is that the evils-to-be haven’t gotten their hands on it yet, so there is no GMO wheat out there as of now. Yay!
Materials
5 canning jars with one lid and ring
Winter wheat berries or sprouting seeds of your choice
Roll of screen or any other surface that will allow water to drain but will keep the sprouts in the jar. You can use cheese cloth, plastic needlepoint sheets or ready-made sprouting jar lids.
Heavy-duty rubber bands (mine say #84 on the bag)
Directions
1. Gather your supplies. You’ll want to make sure you’re jars get a quick wipe out with some soap and water if they are from your dusty basement like mine.
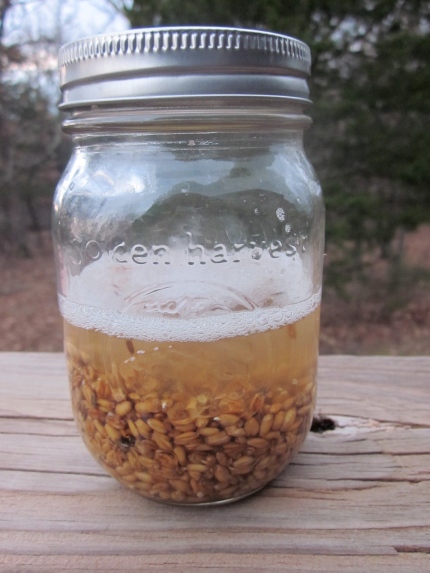
2. Fill one jar with 2/3 cup of wheat berries. I use pint-sized jars with this amount of wheat, but if you are adding more seeds you’ll want to use a larger jar. Fill jar with water about half way, making sure all the seeds are submerged, and put a clean lid and ring on top. Sit away in a dark place. I sit my starter jar in our kitchen pantry cabinets to begin.

3. Allow jar to soak overnight. This is the only time you will actually allow the seeds to sit and soak in water.
4. The next morning, take the lid off the jar and place your piece of screen on top. Secure the screen to the top with a rubber bad. Once the lid is on securely, pour the water out of the jar and into a sink. Then rinse the seeds with running water, and drain out all the water. Sit the new jar in a sunny windowsill and start a new jar to put in the pantry. Rinse jars twice daily.
5. Continue this process until you have a total of five jars, one starter jar and four in the windowsill. Usually by this time, the sprouts have gotten large enough to provide a meal for the chickens.
Day 1

Day 2

Day 3

Day 4

Day 5 – ready to feed!
6. Take the screen lid off the top of the jar and empty the sprouts into a strainer. Don’t be afraid to use a fork to help pull them all out. After you empty the jar, be sure to scrub it out with a bit of dish soap to discourage bacteria from growing in your next round.
7. Take the sprouts outside to your chicken feed pile and watch them go wild!

A basket full of sprouts, ready for feeding!
And the chickens sure do love them. Here they are enjoying the morning buffet.

The flock devouring the sprouts when I first brought them out.

One little red digging in.
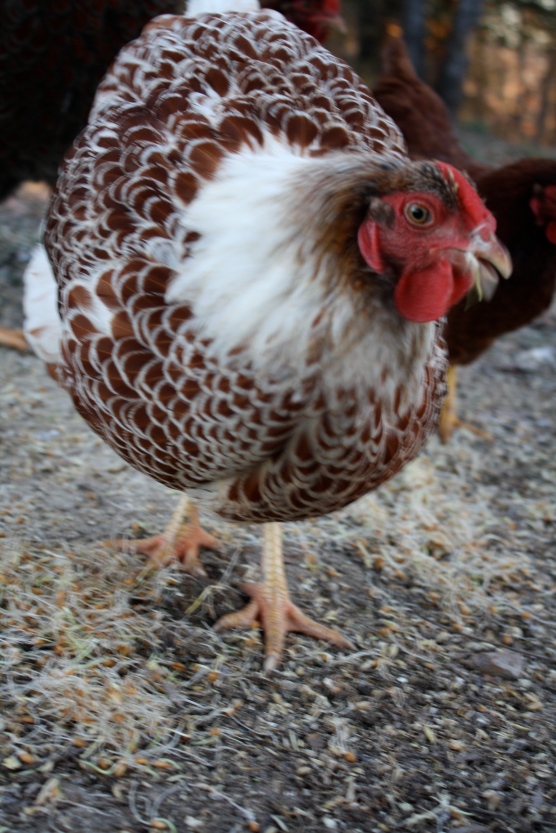
Sweet Pea couldn’t eat them fast enough!
This post is part of the Homestead Barn Hop. So hop on over to http://www.theprairiehomestead.com/2014/01/homestead-barn-hop-141.html to see other neat homesteading ideas!
It’s also a part of the Clever Chicks blog hop located here. Check it out.

Very cool! I’ve always wanted to try this for my flock (and myself) but I haven’t yet. It’s awesome that you got all the winter wheat for so cheap! I love the idea of using the sprouts to supplement the chicken feed to reduce cost. Great idea!
Thanks, Tammy. Winter wheat is super cheap if you buy it at the feed store. Of course, it has a few too many stones and sticks for human consumption, but it works perfectly for the chickens. With such cold temperatures, I’ve been mixing hot oatmeal in with the sprouts that way the sprouts don’t freeze from the quick rinse and the oatmeal keeps them from making too big of a mess inside the coop. It’s working great!
Wow, this is so brilliant! I try to stay away from GMO feed or grains, also, and all summer I got into the habit of overnight soaking of the grains that I had. I have a flock of about 50 chickens, so I soak my grains in 5-gallon buckets. But this idea of actually growing the sprouts is even better than overnight soaking. Well done! I’ll be sharing this on my facebook page this week: join me over there! https://www.facebook.com/vomitingchicken
Thanks, Amy. Your flock is a little bigger than mine. 🙂 I’ve looked into some really neat and inexpensive fodder systems you can DIY at home, but I didn’t have enough chickens to make it worth it. You might google around and see what you can come up with. I think it just takes some PVC pipe, plastic tubing and a pump. Good luck! Heading over to check out The Vomiting Chicken (lol – Love the name!).
Thank you Amy. I am going to have to d this with my kids for a healthy food project. I love you idea!
This would be great fun with kids. 🙂
I love sprouts, I know that when I had chickens, mine loved them as well. It makes so much sense to grow sprouts for chickens. Buy a fifty pound bag of sprout-able grain and everyone benefits!
Exactly! There is no bad part about it. 🙂
Pingback: How to Grow Sprouts In A Mason Jar For You Or Your Chickens - SHTF Preparedness
Pingback: How to Grow Sprouts In A Mason Jar For You Or Your Chickens - Lil Moo Creations
Reblogged this on The Valley Homestead.
Reblogged this on 2 Boys 1 Homestead.
Mother Earth News dropped this article on facebook! I love it! Thanks for sharing! I’ll be using these for our future chickens and for my own stir-fry’s!