When life gives you chickens…

…you get chicken poop. That’s the long and short of it. What makes chicken poop more manageable? Poop boards.

IMG_0076
When I was planning our coop, the one element that I kept coming across in coops that everyone raved about was poop boards, a feature in which chicken droppings are caught in some fashion, making it easy to remove. I am now one of those people raving about them, and hopefully someone who is planning their coop will read this. If that’s you, then listen up…build these!
Poop boards, also known as dropping boards for the more polite, range in design. Some include a canvas hammock suspended under roosting bars, some have a pull out tray that can be accessed from the outside of the coop and some, like mine, is basically a large litter box.

IMG_0082
To build ours, we just used a large rectangle piece of scrap paneling to form a bottom base then we used scrap trim to build sides on the bottom and to run boards under the paneling to support the bottom. We then filled the box with stall dry, a product found at most feed stores which is primarily marketed as a horse stall covering. Since we’re lazy, we just sat the tray on two upside down 5-gallon buckets directly under the roosting bars. We then bought a metal kitty-litter scoop, and when the board gets full like this… (OK, I probably should have cleaned this sooner. This is about a month and a half worth of droppings from 13 chickens).

IMG_0073
… You just use your kitty litter scoop and scoop it out. I wear gloves and a respirator (a respirator only because my husband has one at the house for working on cars. A face mask will work just fine. You just don’t want to breathe in the dust).

IMG_0074
It took me about 15 minutes, and all the droppings were separated out and ready to be composted, and a fairly clean coop was left behind.

IMG_0078
It is especially important to clean your coop out in the winter, because the moisture in the droppings can cause your chickens to develop frostbite. The poop boards leave the rest of your coop primarily poop free, which means you have beautifully clean eggs waiting for you in the nesting boxes.

IMG_0085

Garden-brain. Planning for warmer days ahead…

It’s been unusually warm this weekend, and overall we’ve had a very mild winter so far. Temperatures were in the mid-fifties yesterday and the sun was shining. Although today was supposed to follow in the same wonderfully warm fashion, the weather-woman changed the forecast at the last minute. It’s still in the mid-forties, but the wind is fierce and it’s just started sprinkling. Comparing this weather to last year’s deep snows, intense ice and brutal temperatures, one can’t help but be happy.
My garden interest calendar tends to follow the same pattern each year. Something like this:

January/February – Oh, won’t it be fun when it’s warmer and the garden gets going?
March/April – I CANNOT wait until we get some vegetables out! What? We’ve got lettuce and greens coming in? Alright! Salad for every meal.
May/June – We’ve planted a lot, but we’re not picking much of anything. I hate the dreaded early summer lull.
July – Oh my goodness, I love tomatoes, peppers and cucumbers. I love my garden.

August – When are these dang tomatoes going to quit!? I swear they’re doing it just to mock me. I’d love a night or weekend day that isn’t focused solely around picking, scalding or canning.
September/October/November/December – Do not speak the word garden to me.

Since I’m back into the mindset of being excited of the upcoming garden season and we’ve had such mild weather, I’ve been thinking dirty. Err… garden dirty I mean. So, I got out my shovel and started working. I cleared out all of the old, dead vegetable vines from the garden, turned over the soil in the rows of the hot-bed garden and worked some organic material and compost in.

IMG_9443

As an added bonus, I started cleaning out the old growth from some containers around the property. When I pulled at this dead planter, I got a wonderful surprise!
IMG_9446
IMG_9454

Jerusalem artichokes! I got these from a friend last year and totally forgot that I had planted them. When I pulled out the large stalks, the wonderful roots (a potato-like vegetable) came to the top of the soil. I harvested a small batch, and plan to wash them up and cook them this week.
What have you been doing to work or plan for the upcoming months?

A new year, a new plan and a new snack drawer

Hello, my long-lost friends. Just popping in to say hello and to let you know that I miss you all! I have not sailed off the face of the Earth, even though it probably seems like I have.

Sometime last summer I got overwhelmed and fell off the blogging bandwagon. There was too much garden to take care of, too many chores to do, too much canning and pickling on the stove for too many hours, too many Friday nights up until 3 am preparing for too many long (but wonderful) Saturday mornings set up at the farmers’ market. Add on top of that the time and effort of helping to establish and organize a grassroots local food effort in my hometown, which is taking on a variety of awesome small- and large-scale initiatives, I was running on fumes mentally and physically.

But it’s a brand new year. I’ve had a little rest, and I’m back! I’m hoping to keep my life a little more balanced and a little less busy this year, so I am planning on writing more consistently.

A lot of my effort recently has been focused on organizing our food buying, cooking and eating plans so that we are eating more of the food we’ve grown/raised, we are eating well, spending less money and feeling less stressed.

After consulting my friends on my personal Facebook page about their meal planning routines, I’ve come up with a great plan that is working really well for us. I plan to do an in-depth post on that soon, but I wanted to show you one element that is so simple but has made my life so much easier – the snack drawer!

snack drawer

After I come home from grocery shopping Sunday mornings, I cut, chop and prepackage healthy snacks in individual portions so we can grab them easily in the morning on our way to work. Right now we have french-vanilla yogurt and fresh raspberries, broccoli and hummus, string cheese, almond milk, apples and almond butter, Babybel cheese, a variety of fruit (in the crisper drawer below), hard-boiled eggs, apple sauce and cottage cheese. I have a separate drawer in the pantry with dry snacks – pretzels, organic popcorn and real veggie chips. It makes it easy for me to stay on track throughout the day without feeling deprived.

Do you have a grocery shopping, meal planning, cooking or food organizing tip that has made your life easier?

Real life – blood, worms, lice and all…

Gosh, it’s a busy time of year, isn’t it? It seems like everything needs establishing in the spring – seeds need started, then transplanted, new garden needs tilled, fenced and planted, trees need planted, trees need mulched, hive needs assembled,  chickens need a new coop, new chicks need a brooder and constant care, organic veggies need a watchful eye… With working one full time job, one part time job, heading up a local food group and doing all my wonderful projects at home, I’m starting to feel a bit overwhelmed and exhausted. Soon enough though, everything will be established, and we’ll just be maintaining it all. Which is a step down in the labor department, or that’s what I keep telling myself anyway.

So although I’ve been somewhat absent for the last month on the blog, life has been trucking along as past paced it always does. In addition to all the springtime chores, I am slowly making my way through a wonderful book called Animal, Vegetable, Miracle: A Year of Food Life by Barbara Kingsolver. (That means I read about two pages a night before I pass out from exhaustion). It’s a book that I highly recommend to anyone and everyone who eats (yes, that is all of us). It gives a wonderful look at a family who feeds themselves only local food for one entire year including growing a large amount of it themselves. It’ll open your eyes to how little sense our current food system makes and the reasons why it is absolutely imperative we change our ways. It’s incredibly inspiring.

The one thing that’s missing, though, is the wonderful challenges and tribulations we suffer as producers of our own food. The Kingsolver land is never plagued by pests or drought or flood-washing rains. Mother Nature is always perfectly cooperative, and insect don’t ever visit the farm. I’m afraid it gives a false sense of continual success to those who don’t currently grow their own food, and it leaves those of us who do rolling our eyes a bit. So, in that spirit, let me tell you about my trials over the past week or so.

First, three of my four chickens attacked one of my hens, Bonnie, in a BAD way. The first hard peck left a dime sized hole in the back of her head which immediately gushed with blood…. and we all know what chickens do when they see blood. Luckily I was still home before going to work that the morning, and I was able to get her out before she was killed. I brought her inside and washed off the blood, then put her in the new coop by herself to stay.

bonnie 2

Wound after cleaning – I won’t show you the before picture. Believe me, it’s gross.

bonnie 1

Sweet Bonnie was the perfect patient in the makeshift bathroom wound care clinic.


bonnie 3

Bonnie was very thankful for the extra attention.

Two mornings later,  I brought her inside to check out the wounds. What I found was a goopy mess of a wound crawling with little white wriggly things. I instantly thought they were maggots (gag!), and brought her inside to the bathroom to clean her up. I flushed the wound out with saline water, picked out the little white wriggly things with tweezers and applied a generous amount of antibiotic ointment. I kept her in a dog crate for one night, then let her stay in her respective coop away from the bullies the next day.

That same morning, I noticed that one of my tomato plants in my garden was snapped in half. I figured my little rat terrier, always right on my heals, must’ve stepped on the plant when he was following me around in the garden while I watered. I didn’t think much of it, but when I came home from work at lunch, I noticed two more. By the time I got home after work, 5 tomatoes and 4 pepper plants lay shriveled up on the ground next to the roots. A friend helped me identify the culprit, cutworms. I had never had them before, but these little buggers are destructive – in a big way! They wrap their little bodies around the stem of the plant and literately cut right through it, severing the plant from the roots. I went out after work (in the pouring rain) to fit little aluminum foil collars around all the plants that were left. I also dug around the soil in the ones that were cut and found these:
cutworms

They became chicken food right away to poor Bonnie who was still recovering. We brought her inside that night, and noticed that she had lost more feathers, and my husband had a little tan bug run across his hand. Then we noticed a few on her skin. We noticed a couple week ago that her breasts were both picked completely clean, but we read online and thought she had done that because she was about to go through a broody spell. I had also read that it could have been linked to lice or mites, so I did another search of lice. I skimmed through the articles and kept seeing this photo and story from The Chicken Chick:

Mites & Lice
So, I kept looking at the base of all her feathers to see if I could find nits like this, and I never did find anything. That is until I actually read the article – the nits collect like this at the base of the feathers near the VENT. Since I don’t often examine the rear ends of my chickens, I hadn’t looked. When I did, I saw a huge clump of nits just like this (ugh!) and dozens of little lice running all over the place. Yep, you guessed it. The little wrigglies I thought were maggots were actually small little lice  It makes me itch just thinking about it. Luckily chicken lice is not able to live on a human host. Still creepy-crawly though. We went outside and checked the others in the coop, and they were the same. Luckily we had some diatomaceous earth on hand. We dusted all the chickens until they looked like they had just left a bakery. Then we covered the coops. We’ll redust again in 7 to 10 days.

worms

Then just today, I noticed a whole head of lettuce was gone, and the others had some serious holes in them. I found these guys on the underneath side. Cabbage worms. *Sigh* Organic gardening is just tough sometimes. I picked them all off and fed them to the chickens again. The chickens are getting extra protein these days.

So, as you can see there are plenty of trials and tribulations with growing your own food. If you grow your own food, you will experience these things too. Just know it’s completely worth it in the long run. We just had our first salad of the season almost completely sourced from the garden. I ate eggs from my own backyard hens. I held sweet little chicks. I poured a little bit of my heart and soul into the soil of the garden. Fresh air, sunshine and a connection with one of the most fundamental parts of human life. It’s truly a beautiful thing.

The new bee home is finished… finally!

Spring brings a lot of chores and a lot of preparation for the coming summer months on many different fronts around the homestead. Among the many projects we have been working on, one of the more immediate ones was to assemble and paint the Dreckman’s first ever bee hive. I received a call from our Missouri bee supplier a couple weeks ago, who said a nucleus colony will be delivered in just over a month! Since the hive needs a bit of time to air out after being painted, it needed to get done ASAP.
So, I got up early on Saturday and was determined to get it done. And done it got! Here are a few photos of the process…

Hive
IMG_8787

I wanted to get a screened bottom board with a Varroa mite trap, so I opted out of a hive kit, and instead bought separate unassembled components for the bottom board, telescoping cover, two deeps, two supers and 40 frames from Mann Lake LTD.

IMG_8788

 
IMG_8790

IMG_8791

IMG_8804

Although it was a bit time consuming, it went together fairly easy. The 40 frames seemed to take forever to assemble.

IMG_8794

I wish I could remember where I originally saw this idea, but I can’t. It was somewhere on Pinterest, but it is the absolute best idea to be able to paint all four sides and all edges of the hive boxes without the paint sticking to anything. I highly recommend it. I slapped 3 coats of this beautiful shade of blue (“Safe Harbor” for anyone who is interested), and let them dry overnight.

IMG_8796
Again, excuse our messy garage. It’s well worked in. 🙂

IMG_8801
The finished home! I just need a couple of cinder blocks to sit it on, and I have to decide completely on the location. I just love how cheery the color is. I hope the new girls will be happy too.

Do you have bees? Any tips for this beginner?

It’s been busy around here…

Hello my long-lost friends!

You probably thought I’ve disappeared off the face of the earth. Not yet. I’ve just been busy as a bee offline working on lots of different projects. When I started my blog, I thought I’d be able to have one neat little blog post for each little thing I was doing around the house. In reality, that doesn’t happen, for me anyway. So here’s a little recap of what’s been going on behind-the-scenes at Hens and Honey.

IMG_8655
My indoor seed starting station is doing wonderful. I have over 20 heirloom tomatoes growing well. My bell pepper plants didn’t do as well as I’d like, but I have a few of those still trucking along. I also have some broccoli rapini and I planted several marigolds.

IMG_8629

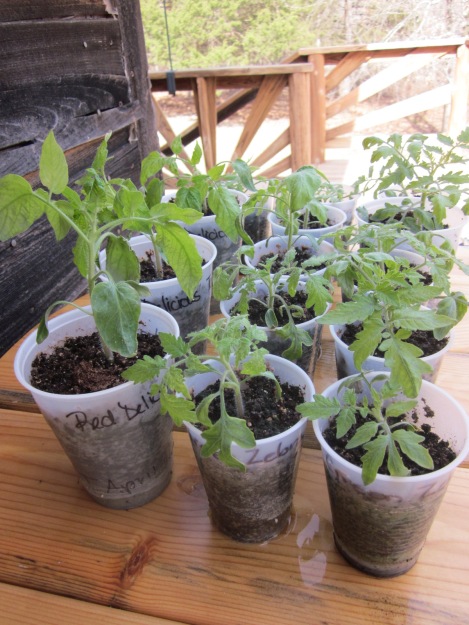
On sunny days, I’ve been bring the plants outside for some real sunshine and breeze (which is supposed to strengthen the stalks). They seem to like it.

IMG_8646

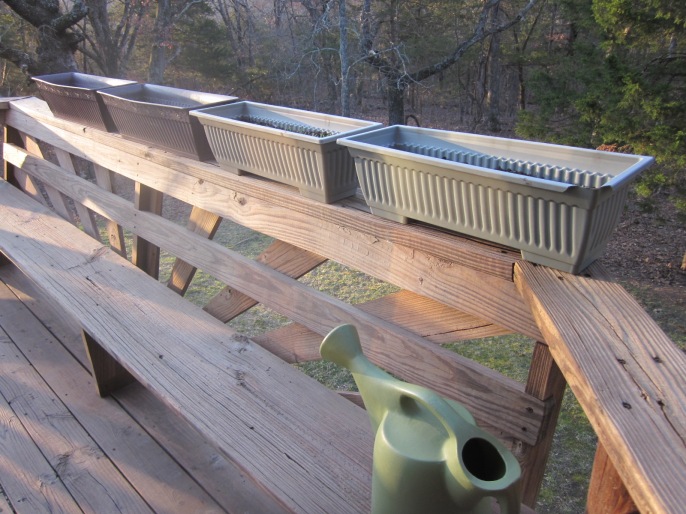
I recently planted two window boxes of lettuce and two window boxes of spinach. They spend their days on the sunny south-facing back porch. I planted my herbs this way last year, and I had a lot of success.

IMG_8633

So far, so good. Here’s my lettuce.

IMG_8635

Here’s the spinach. Lookin’ good.

IMG_8638

Here are my raised beds that I established last year. This was about the extent of my garden last year, because my mom grows a monster garden that I help with and harvest from.  it worked really well for cool-weather, shaded crops, but it didn’t work as well as I’d liked for my tomatoes and peppers. The cattle pannels were perfect for growing beans on! So, I planted these beds with onions, peas, lettuce, greens and spinach.

IMG_8639The laundry baskets are new this year. I decided to try to grow my potatoes in them instead of directly in the earth. Here’s the post that inspired my idea: http://www.vegetablegardener.com/item/5215/growing-potatoes-in-a-laundry-basket. At the end of the season, you’re just supposed to dump the dirt out and the potatoes will fall out too. No digging. We’ll see how it works.

chickenmess
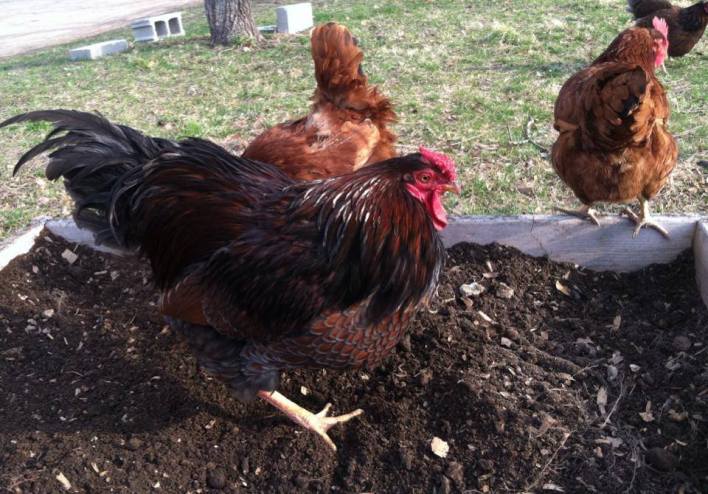
After I planted my first batch of peas, my chickens lovingly scratched them all up. *sigh* They didn’t get the memo that the tilling season is over, and planting season has begun. The beds now have chicken wire laying on them.

IMG_8641

Since I’ve transformed my raised beds in to cool weather beds, I need somewhere to put all those tomato plants and everything else I hope to grow. So, I’ve tarped off this 16 foot by 30 foot sunny spot to hopefully make into my larger garden. I haven’t decided if I will till it or do no-till, raised rows. It kinda depends on how fast the grass dies.

IMG_8642

Here is one of the nine fruit trees I planted. I tried to photograph the whole lot, but it just looked like an ugly field full of sticks. I need to get some mulch on them sometime before summer. They came bareroot from Stark Brothers Nursery in Louisanna, Missouri. We have two apple, two pear, three peach and two cherry. I know not all of them will live, but I hope most do.

house

The new chicken house is coming along. Since this is a refurbished playhouse, it’s been difficult logistically to do some of what we need to. We pained the side boards…

IMG_8650
Installed these windows… Note: we found some windows at Lowes that just about fit the holes perfect-ish. We just had to fill in with a little bit of caulking, so you couldn’t see daylight. Also, we had to install the windows inside-out, because 1. the siding was already put on, and it would have been difficult for us non-carpenters to remove it to install the window and 2. The inside of the coop will have hardware cloth covering all the holes, so there would be no way to unlock and open the window if it was put in like it was supposed to. We cut trim to go around them, so it won’t be such an eyesore. You can see some of the pre-painted trim above.

IMG_8647

Which brings me to the next item. I’ve been painting lots of trim for the coop! Excuse our messy garage.

front door

We’ve also built a couple doors for the coop. The front door, which can be seen from the house and driveway is this the one above.

back door

And this is the back door, which is split into two parts. The top part will latch to a hook above, and the bottom part will fold down for a ramp for the chickens. I have all the door components painted, but no photo. The doors will be the same color as the siding, and the trim is white.

beehive

I also assembled my hive. I have the paint, but still need to paint it.


IMG_8654

I have another deep and two supers that also need to be assembled. They are still laying in my living room floor.

IMG_8653

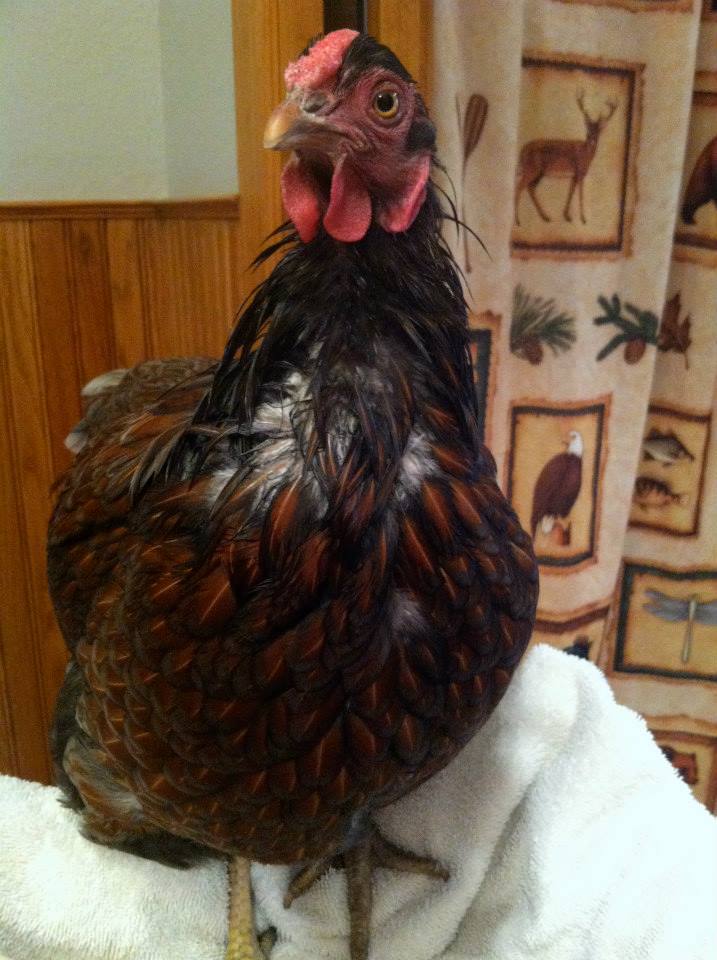
My chickens have had it pretty rough lately with an overly-ambitious rooster. Lots of feathers missing from their heads and backs. We decided to get more laying hens as soon as we get the new coop and run finished, then we’ll have the six chicks coming in May. Chicken math is real, people!

IMG_8640

There are a few other things going on around the homestead, but I’ll leave you with that for now. What’s going on at your house?


Prepping two weeks worth of smoothies for quick breakfasts that pack a nutrition punch

Blog title smoothies

I don’t know how your mornings are, but mine are a frantic, mad-dash out the door. I usually wake up around 6:30 a.m., go let the chickens out, feed them, fill their waterer, maybe give a pat on the head, head inside to turn on the lights at my growing station, water all the plants, jump in the shower and jump out, flip on the blow dryer and slap on some makeup. This process generally lasts until around 7:50 a.m., which leaves me with 5 minutes to make and eat breakfast and 5 minutes to drive to work. It worked for me for a long time, but alas… I’ve had to change it up. I seriously have no idea how people have kids, get them ready and drive them to school before work. It just amazes me.
Anyway, my husband leaves at 7 a.m. for his daily commute, and until recently I hadn’t worried about helping him get ready in the mornings (see lack of time/kid comment above), but when I noticed that all the local workers at the gas station knew him by name because of his morning stop for a processed, utterly disgusting sausage, egg and cheese biscuit and a Mountain Dew or even worse, a Monster energy drink (yes, gasp here), I decided I probably needed to add a little time in to help him out in the mornings.

My husband says, and I truly believe him, that he feels the same way about food as I do. We have so many of the same values when it comes to what is wrong with the food industry today, but he is just… well, lazy. If it’s not convenient, he’s not going to do it. Yes, yes… it’s frustrating.
So, I decided that I would prep his morning breakfasts over the weekend, including homemade bacon, egg and cheese biscuits (local, hormone-free bacon, our farm fresh eggs, whole wheat biscuits) and healthy smoothies, and then I could just wake up 15 minutes earlier and have it all ready for him when he hopped out of the shower.
So, I’ll post about the biscuits later, but here is how I prep all my smoothies. The greens freeze wonderfully, and it’s really quick to throw it in the NutriBullet and blend for a few seconds. I try to buy locally grown fruit in the summer (and with my new little backyard orchard this year, I hope I can eventually harvest from my own trees), freeze on a cookie sheet and keep in a big bag in the freezer. I’m running low this year, so I bought a few bags of organic frozen fruit from the local health food store.

IMG_9021
1. Gather your supplies. I went with a big tub of organic 50/50 baby spinach and spring mix. It packs a super nutrition punch, but it is easily masked by the fruit. You can also add kale, lettuces, etc… Basically whatever your heart desires. I wouldn’t recommend swiss chard though. The last ones I made with them tasted very… earthy.
I also really like to use bananas in most of the smoothies. They lend a creaminess to the smoothie that is so good, plus who doesn’t love all that potassium and what-not. I have local blueberries I picked last year and peaches from a local Amish produce auction. I also bought bags of frozen pineapple, strawberries and raspberries. They were expensive though, so I’m going to really stock up this summer on fruit in season in order to avoid buying the bags of frozen.
IMG_9022

IMG_9023

IMG_9025

2. Use your cup to measure out your ingredients. I fill mine half up with greens, then add whatever fruit I want until it fills the cup for the NutriBullet. Then take the cup and dump it into a ziplock bag. You want your frozen fruit at the bottom and your greens at the top to get the best blending. With the NutriBullet, you end up screwing the blades on the bottom and flipping the cup upside down, so I make sure my greens at at the top of my ziplock.
IMG_9026

By the way, I reuse my bags several times before throwing them out. They usually make it through three or four different batches. When I empty the bag in the morning, I turn it inside out and rinse it, then sit it out to dry.

IMG_9027

IMG_90283. Roll the baggie up to expel any air from it. This will help keep your fruit from getting frost bite. Once all the air is out and they are zipped, flatten the fruit out on the counter with your palms so the bags will stack nicely in the freezer. (You’ll also want to label correctly. I don’t see any peaches in this bag. lol.)

IMG_9029 IMG_9030 IMG_9031

I like to make several different varieties, so that we don’t get burned out drinking them. Top is mixed berry (strawberry, blueberry, raspberry); second photo is strawberry banana; and third photo is blueberry, pineapple, banana.

IMG_9037

Then just throw all the bags in the freezer! Simple as that. In the mornings, I pull a bag out, dump it into the Nutribullet cup, fill with water and usually add in some chia seeds or flax seed for extra nutrition, then blend. That’s it.

IMG_9032

IMG_9033

…and Viola! So much better than Mountain Dew! Do you do weekly breakfast prep? I’d love to hear your ideas and recipes.

Using what you’ve got…

blog title

Mary, Mary, quite contrary,

How does your garden grow?

With an electric blanket, shop lights and my plants all lined up in a row!

… Oh, wait a minute. That’s not right…

I like to think life is a continual journey of understanding. I don’t think we ever cease to learn during our lifetimes, always making mistakes and understanding the world a little better because of those mistakes.

It’s something that I, as a recovering perfectionist, have to work actively at remembering, but it’s something I truly want to embrace.

With that in mind, I’ve been trying to embrace my past mistakes and make changes that help me grow. Gardening is no exception. I’m young, and my years of tinting my thumb green are few compared to so many more experienced gardeners out there. But I’m continually working at it.

For many years, I have started my garden from nursery plants However, last year, when I learned more about the production of our food, including the concerns with GMO seeds, my mom and I decided to start our plants from seed in order to have complete control over the varieties of fruits and vegetables we grew. We ordered all of our seeds from Baker Creek Seed Company, a wonderful heirloom seed company known all over the world that just so happens to be located about 45 minutes from our house in Mansfield, Missouri. I’ve continued my love for Baker Creek, and used only their seeds so far this year too.

seeds

Mom’s first Baker Seed order of the year

We ended up with a beautiful harvest of vegetables throughout the year between our two gardens, but our plants were a little spindly and lacked the thick stems of the nursery plants we’d previously used.

harvest

Part of our 2013 harvest

So, this year we were on a mission to improve our seed growing abilities and produce stronger plants.  After a little research, we decided that our plants probably didn’t get enough light, although they were in a very sunny window. So, they were putting all their energy into growing upward in hopes of drinking in more light instead of bulking up around the stems.

We looked at grow light stations and different setups online, but they were all so expensive. With new hives, new chicken house, new fruit trees and all the other expense we’ve put out into our homestead this year, we just can’t afford to buy an grow station online. So, what’s a girl to do? Make what you’ve got work for you.

Here’s my new setup. I can’t say if it’ll work yet or not, but I hope it does!

1. First, I decided to sacrifice our kitchen table for the sake of our garden for the next couple months. Honestly, we really don’t eat at it very often anyway, instead eating at the bar in our kitchen or in the living room (gasp!). So, I just pulled it over to the sunniest spot in the kitchen next to the sliding doors and south facing window. Be warned though, if you come over for dinner, you may have to eat from a plate on your lap while you’re sitting on our couch, and there will likely with three very interested dogs at your feet.

IMG_9010

2. Since I’ve read that it is best to keep the soil around 70 degrees for more plants during the seedling phase, I decided to pull out an old electric blanket from the linen closet. We haven’t used it much, so we won’t miss it during its use in the next couple months. I plugged it in and kept it on the lowest setting.

IMG_9012

3. Since electric blankets probably shouldn’t get wet, I took a big lawn and garden trash bag, cut it down the sides so it was one large flat piece of plastic and covered the blanket.

IMG_9013

4. I used some old bricks in our basement to create a “stand” (if you can call it that) to place an old florescent light from our garage on. From what I’ve read, you can use regular old florescent lights for growing seeds with pretty good results.

IMG_9014

5. From the advice I was given, you want to keep your lights about an inch from the plants. As the plants grow, I’ll probably add more bricks or come up with some other way to hang them.

IMG_9017

IMG_9016

IMG_9019

So, here’s to hoping the new plan this year helps produce more successful plants! Have you rigged up a homemade setup for your seed growing? I’d love to hear about it.

This post is featured on the Homestead Barn Hop #149: http://www.theprairiehomestead.com/2014/03/homestead-barn-hop-149.html

My favorite part of Wednesdays – organic produce box!

IMG_8987


I’m so sorry for my absence.

If you didn’t already know, life gets busy sometimes, and it’s hard to find time to write blog posts. I found this out first hand the last couple weeks! I’m back now.

Even though I’ve been silent on the blog, I’ve been busy planning away (and posting a lot on the Hens and Honey Facebook page. Go check it out if you haven’t already.)

Since I’ve talked to you last, I’ve attended two beekeeping classes, ordered a nucleus colony (nuc for those bee-fluent readers out there), ordered my bee hive, realized I need to order a couple more components for my bee hive, continued to plan the new chicken coop and run, worked to start moving my existing raised garden beds to a new sunnier location, started some tomato, pepper and broccoli seeds indoors and started planning for the 9 fruit trees I ordered to be delivered in March. So, things are a wee-bit busy around here.

Anyway, I wanted to stop in today, though, and share my excitement for Wednesdays. I love Wednesdays, and it’s not just because it’s hump day. It’s because it’s the day we receive our organic co-op fruit and veggie box. It’s like Christmas every week.  See look at this:

IMG_8966

$25 mixed fruit and veggie box – all organic, provided by Ozark Organics

How can you not get excited about a huge box of completely organic fruit and veggies, delivered right to your office every Wednesday for less money than you could buy the stuff at the store. It’s amazing, I’m telling you.

So this colorful collection of organic food is provided by Ozark Organics, a local organic food co-op ran by Bob and Wendy Seymck who also own Willow Mountain Mushrooms. They source as much of the weekly box components as they can locally, then fill in orders with small farm producers and finally they buy things not available locally or small-scale from larger organic producers. Each week, we get an email with the weekly breakdown, but honestl, I like to be surprised, so I don’t usually peak at the list.

Buyers have the option to order a “half-share” for $25 (this is what I get) or a “full share” for $50.  Of those options, you can specify if you want a mixed fruit and veggie box (this is what I get), fruit only or veggie only. A juicing box is also available for $35.

Ozark Organics delivers these gems each week to our town of Gainesville, where most people meet at a pick up point. However, if you’re lucky like me and work on the town square, they will deliver your box right to your office.

They also service Willow Springs, West Plains and Mountain Home, Ark. See their website at www.ozarkorganics.org for more information on pickup points and times.
Now, onto the good stuff. Here is a little breakdown of what this week’s box included:

One pound of carrots

One pound of carrots

Four apples - Okay, five apples, but I ate one while I was at work

Four apples – Okay, five apples, but I ate one while I was at work

two oranges, one grapefruit, one kiwi

two oranges, one grapefruit, one kiwi

two red onions

two red onions

two roma tomatoes and two red bell peppers

two roma tomatoes and two red bell peppers

a bunch of rainbow swiss chard

a bunch of rainbow swiss chard

one large head of broccoli

one large head of broccoli

one bunch of five bananas

one bunch of five bananas

one large head of buttercrisp lettuce - with the root attached, check out the next photo

one large head of buttercrisp lettuce – with the root attached, check out the next photo

lettuce with the root attached.

lettuce with the root attached.


The lettuce just may be my favorite part. It’s hydroponically grown by a local farm called Five Oaks out of Branson. It’s delivered with the root still connected. Each week we plop it in a little jar of water and sit it out on our kitchen counter. It not only serves as food but also kitchen decor! It stays fresh for weeks there, but it usually gets gobbled up way before that.
You can also add on pasture raised pork, beef, chicken and free range, non-gmo eggs to any order. Since our freezer if full of pastured meat and we have our own little flock of egg producers, I haven’t taken advantage of this option. We buy in bulk from some of the local meat producers that Ozark Organics utilizes, so I know that it’s quality stuff.
With the weekly organic produce box, our freezer garden fare and frozen meat, we hardly ever go to the grocery store, which is such a freeing feeling.
Do you take advantage of a local co-op or CSA? I’d love to hear about it.

Super easy DIY cooking spray

cooking spray

Back again with a quick, easy and frugal kitchen tip! Homemade cooking spray!
I discontinued using commercial cooking spray about a year ago when I learned that our dear friend Pam had a dirty little secret. She’s filled with nasty chemicals, GMO ingredients and propellent. Yes, propellent. Wikipedia defines the propellent ingredients in cooking spray as food-grade alcohol, nitrous oxide, carbon dioxide or propane. Who doesn’t love some food-grade propane in their next meal? Well, me.
I definitely do not want to put that garbage in my body, and if I had kids, I definitely wouldn’t want to put it in their sweet little innocent bodies either.
At one point in my life, I figured if a product was sold in the U.S., surely it was safe. I mean, the FDA regulates that kind of stuff, right? After a little research, my trust in the FDA has waned. Without going full-on lecture mode here, I’ll just say if you have an ever-trusting relationship with the governmental bodies tasked to keep our food safe, I recommend you do a little research of your own.
So, back to the task at hand. Homemade cooking spray. You’re going to love how ridiculously easy this is.
IMG_8918
Ingredients:
Misting spray bottle
Oil of your choice ( I use expeller pressed grapeseed oil, see photo above)
Water
Steps:
1. Mix 1 part oil to 4-5 parts boiled distilled or filtered water.
2. Pour into spray bottle.
3. Shake well each time (because, you know, oil and water don’t mix).
4. Use.

See how easy that was? Why consume food-grade alcohol, nitrous oxide, carbon dioxide or propane when you can whip this up in less than one minute?

Bam! Now your life is revolutionized. Well, maybe not, but it’s definitely better than when you were consuming propane with your waffles. 😉


This post is featured on the Homestead Barn Hop #149: http://www.theprairiehomestead.com/2014/03/homestead-barn-hop-149.html